It’s been ages since I’ve written anything on my blog, and
here I am back on blog mode. Let’s chase away the bats, blow away the dust,
crack some knuckles and get started!
So much happened since my last post, but let’s go from this
point onwards.
I was fascinated by the Raspberry Pi device which is meant
to be a learning device for anyone. However, the intriguing thing is that, this
is a little pockets sized computer (if you look past the cables and the I/O of
course). The small size itself is fascinating, and also being a computer, this
is obviously a multipurpose programmable device, which can be used to do a multitude
of things. If someone did not really have time to have a lot of fun with micro-controllers (which is one regret I have as well), this will be a good
place to try catching up – at a higher level of course. Combine the processing capabilities
and the options available, and projects will be immense from lighting bulbs to
creating your own home security system or more!
The Pi comes as model A and B for now, and the model B revision 2.0 has
256MB more RAM, an additional USB port and an ethernet port. So, I picked the Model B Revision 2.0. If you want to try other options, you can also consider other similar
products like Arduino, Via APC, Beagleboard etc. I found the Raspberry Pi a
better bang for buck and also the community is pretty active.
Info on the Pi are abundant on the web and I do not really
need to duplicate info – but rather link. Just for completion, the device I am
using has the following specs.
Broadcom BCM2835 700MHz ARM1176JZFS processor with FPU and
Videocore 4 GPU, 512MB RAM, 0/100 BaseT Ethernet, HDMI, (2) USB 2.0 Ports, RCA
video, SD card socket, Powered from microUSB socket, 3.5 mm audio out jack,
GPIO port.
Getting hold of one is very easy with a little bit of Googling.
The official providers are Farnell and RS Components.
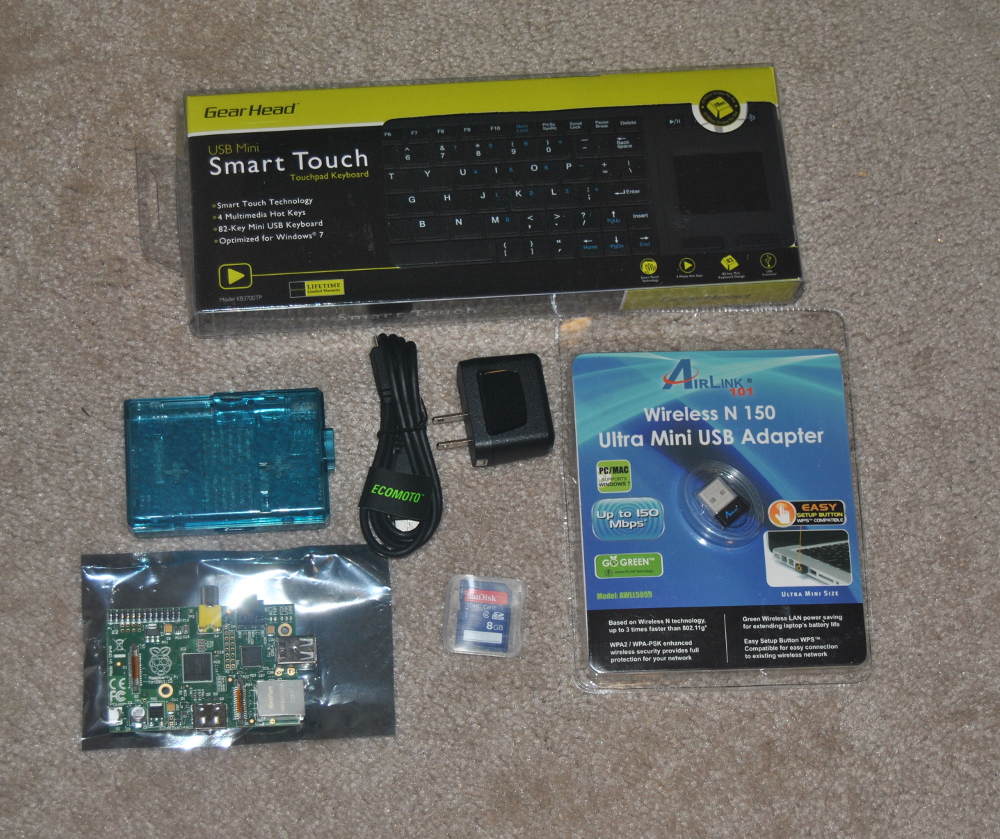
My accessory set up includes the following:
- GearHead Smart Touch Mini USB TouchPad Keyboard
- SanDisk 8 GB SDHC (I had a class 4, but a class 10 is recommended for faster performance)
- Airlink Wireless N 150 Ultra Mini-USB Adapter (AWLL5099)
- Monster High Speed HDMI cable
- Motorola USB Wall Charger with Micro USB Data Cable
- Blue transparent enclosure
There is a huge base of supported devices at http://elinux.org/RPi_VerifiedPeripherals
, and you can pick any combination of accessories to your liking.
Once the hardware is with you, getting the Raspbian OS
(Debian based) on to the SD card is a breeze once you follow the instructions
at http://elinux.org/RPi_Easy_SD_Card_Setup.
The entire process took just about an hour and a half for me. If you want to be
more adventurous there are other OSs you can try, which are outlined in the Raspberry
Pi Wikipedia page. Raspbian itself comes with a bunch of lightweight
applications to get going, but you can add your touch to it easily. Even
without being a too much of a technical guy who like to live on the command
prompt, there are plenty of ways to get things done on the linux platform now,
with the graphical interface turning very user friendly.
Right now this is hooked up to my TV, and it will reside
there for a while. So, I am just getting started here and not able to comment
anymore about speicifics. I’m looking forward to try this out and try doing
some fun projects among other things. Time to learn some Python as well! Any
project ideas are warmly welcome!


